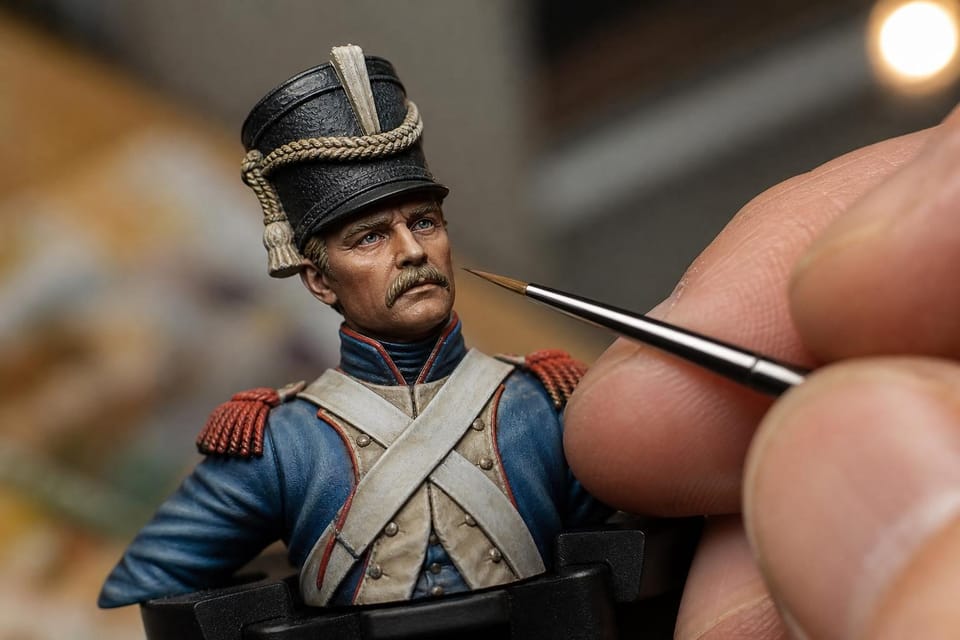
The first stroke on a face is the one you see for the rest of the build. Figure painting is the quietest corner of scale modelling, with no seams to speak of and no engines to detail, only a small sculpture and a brush. Everything is in how the paint goes on.
Sizes and sources
Figures are measured by height, not by a scale fraction. 54 mm, roughly 1/32, is the classic collector’s size, and 75 mm gives more room for detail. Busts, which show the head and shoulders only, often stand 120 mm tall or more and allow painters to concentrate on faces. For armour work, 1/35 figures are sold in sets from Tamiya, Dragon and others, and the armour guide shows how they sit in dioramas.
Materials vary. Injection-moulded plastic kits are cheap and quick. Resin figures, from makers such as Andrea Miniatures and many smaller studios, carry crisper detail but need washing, careful cutting and pinning of heavy parts. White metal is also used for small figures and for historical miniatures. Whatever the material, remove mould lines with a fine file and fill gaps before priming.
Priming and preparation
Priming does two jobs: it gives paint a surface to grip, and it reveals flaws. Spray a thin coat from a can or airbrush, and look at the figure under strong light. Seams, mould lines and finger marks show up at once, and the priming guide covers how to fix them.
Primer colour sets the mood. Grey is a neutral start, black deepens shadows, and white keeps yellows and reds bright. Black over-primed with white from above, a technique known as zenithal priming, gives you a built-in light and shadow map that the colours then follow.
Mount the figure on a handle, a cork or a wooden block with a spot of blu-tack, so you can turn it without touching the paint. Wash the figure before painting; oils from your fingers stop primer sticking.
Faces and eyes
Faces get the most attention and the least paint. Start with a base skin tone, thinned so it does not hide detail, and build shadows into the eye sockets, under the nose and below the lower lip, using a darker mix of the same colour. Lighten the cheeks, the forehead and the bridge of the nose with a lighter mix, blending each layer into the last.
Eyes are the hardest part, and at 54 mm they are only a couple of millimetres wide. Paint the eye area dark first, then add the white as an off-white shape, since pure white looks startled. Place the iris so the top is covered by the upper lid, add a dot of black for the pupil, and finish with a tiny highlight. Use the finest brush you own and rest your wrist on the bench.
Lips are a subtle change from the skin colour, not a red stripe. Stubble is a thin glaze of grey-brown on the jaw. Practising on a spare head from a kit costs nothing and teaches fast.
Layering and glazing
Two techniques do most of the work. Layering means painting successive coats of progressively lighter colour, each one covering less area than the last, so the transitions build up to a highlight. Glazing means laying a very thin, transparent coat of colour over a dry layer to soften the change between tones. The brush painting guide explains thinning and brush control in general.
Thin paint more than seems sensible, with water or a medium, and apply two or three coats instead of one heavy one. Dry the brush on a paper towel, because water in the heel of the brush floods the work. Clothing is the same process on a larger area: dark in the folds, light on the ridges, and a final wash to tie it together.
Citadel’s Contrast paints and similar one-coat products suit wargaming figures, where speed matters more than blending. For display figures, standard acrylics from Vallejo and similar makers remain the usual choice, and oil paints are used by some painters for skin because they blend slowly.
Uniforms, metal and colour research
A historical figure comes with colour questions that a fantasy one does not. Uniform shades faded, varied between makers and changed with the year, so check museum photographs and reference books before mixing. Plain colours look better slightly muted at 54 mm, because full-strength paint reads as toy-like at that size; add a little grey or the base colour of the neighbouring surface to calm them down.
Metal can be painted two ways. Metallic paint is quick, and gives a real sparkle on swords, buckles and helmets, but it flattens at small scale. Non-metallic metal, often shortened to NMM, imitates a shine with sharp light and dark contrasts in ordinary colours, and is the more demanding of the two. A sensible compromise is to paint a dark undercoat, a mid-tone metallic, and highlight with a lighter metallic only on the sharpest edges.
Leather, cloth and fur take different handling. Leather gets a glossy highlight along the edges, wool a matt finish with soft shadows, and fur a dry brush in the direction of growth. Texture matters as much as colour, and a figure with six distinct materials looks more convincing than one with six slightly different browns.
Lighting and display
Painters work under a daylight lamp with a neutral colour temperature, because a yellow bulb distorts every tone you mix. A magnifying lamp or head-mounted magnifier helps at small sizes. Photograph the figure from time to time, because the camera shows imbalance that eyes forgive.
Finish with a matt varnish to remove the shine of acrylic, then add gloss to eyes, wet surfaces and metal that should shine. Mount the figure on a base with a name plate, and keep it under a dust cover.
When you want company for the figure, the subjects hub lists the vehicle and ship guides, and a club table is the best place to see other painters’ work in person.