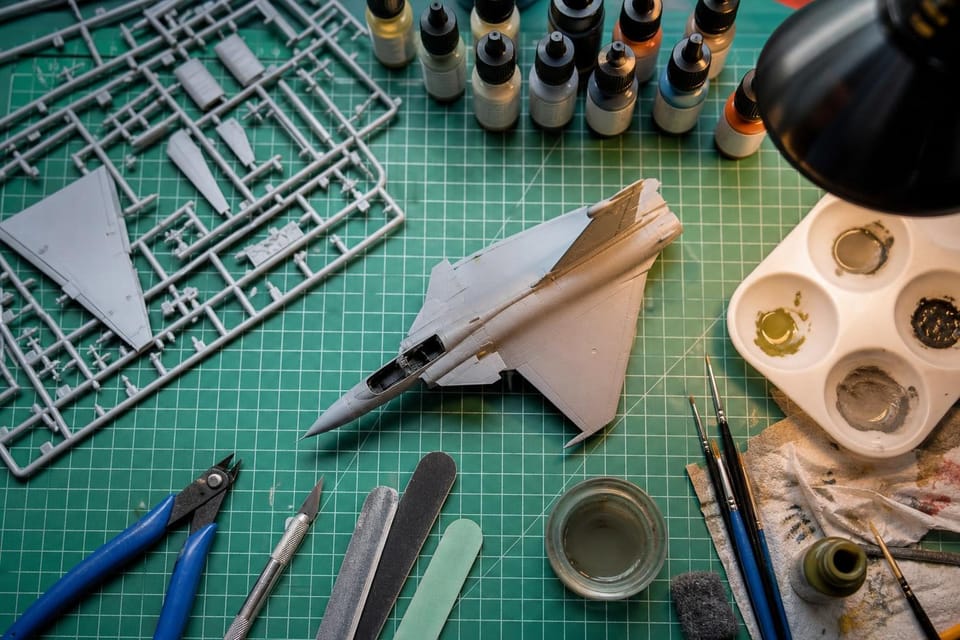
You open the box and a dozen grey frames fall out, each one a lattice of tiny parts joined by plastic stalks. That is the sprue, and the first job is to decide whether the pile on the table becomes a model or a bag of bits. Scale modelling for beginners comes down to a handful of choices made in a sensible order, and none of them needs expensive gear. This guide follows that order.
Choosing your first kit: subject and scale
Start with a subject you would be happy to look at for a month. A Spitfire, a Tiger tank, a Mini, a destroyer, a Star Wars starfighter: the subject carries you through the dull stages such as sanding and masking. Enthusiasm beats theoretical suitability.
Scale is the second decision, and it has more consequences than people expect. Aircraft sit mostly in 1/72, 1/48 and 1/32; armoured vehicles in 1/35 and 1/72; cars in 1/24 and 1/20; ships in 1/700 and 1/350 for the most part. The number is a ratio, so 1/48 means a model one forty-eighth the size of the real thing. Smaller scales fit on a shelf and finish quickly, but the parts are tiny. Larger scales take more room and show every mistake.
For anyone wondering how to start scale modelling, a sound combination is 1/48 aircraft or 1/35 armour: parts big enough to hold, a huge choice of kits and enough surface to practise on. If shelf space is tight, 1/72 aircraft are the compact alternative. The scales guide explains the full list and how scales compare.
Which kit counts as the best first model kit depends on the factors above, but a few rules narrow the field: a mainstream maker, a design from the last twenty years or so, parts that fit without drama and a small part count. Tamiya’s fit is famously good, and Airfix, Revell, Hasegawa and Italeri all offer simpler releases. An old boxing from the 1970s may have charm, but its rough detail and fit can turn a first kit into a battle.
Some examples make the rule concrete. In aircraft, a single-seat fighter has one cockpit, one engine and a short parts list, while a four-engined bomber multiplies every job by four. In armour, a light tank or self-propelled gun has fewer wheels and tracks to fiddle with than a late-war heavy. In cars, a curbside kit with a closed bonnet spares you the engine. A single-seat fighter in 1/48 or a small armoured vehicle in 1/35 is the best first model kit for most newcomers, mainly because every stage of the work is easy to see.
Reading the box: skill levels and kit types
Most makers print a difficulty marker on the box or on their website. Airfix, Revell and others use numbered or banded skill ratings, and the lowest bands mean fewer parts and simpler assembly. Treat the figure as a rough guide, because one maker’s easy is another’s moderate. The parts count on the side panel is often more honest: under a hundred parts is a fair ceiling. For a first kit, a skill level of 1 or 2 and a part count under a hundred keep the evening manageable.
Check also what the box contains beyond plastic. Some kits come as starter sets with paints, cement and a brush included. These can be a good deal for a first purchase, although the paint is often limited in colour range and the brush sized for the kit rather than for detail. A standalone kit with separately bought paints gives better results at a similar total outlay.
Snap-fit and glue kits
Snap-fit kits, sold by Tamiya, Revell, Bandai and others under various names, click together without cement and often come pre-coloured in moulded plastic. They suit young builders and anyone who wants a quick result with minimal fuss. Bandai’s Gundam range and similar sci-fi lines are the best-known examples.
Glue kits need cement, but they offer a wider subject range and a more convincing result once painted. For a modeller who wants to progress, the cement route is the standard path, and the techniques transfer to every kit that follows. A snap-fit kit can still be cemented, filled and painted, so nothing is lost by starting there.
The tools you need on day one
Six items cover a first build: side cutters for removing parts from the sprue, a hobby knife for trimming nubs and scraping seams, sanding sticks in a couple of grits, fine tweezers, a self-healing cutting mat and a bottle of plastic cement with a thin applicator. Add a handful of brushes in sizes 0, 1 and a flat 4 or 6, and a few acrylic paints. That is the whole shopping list.
Spend a little more on the cutters, because clean cuts leave less to sand. Tamiya and GodHand both make nippers that slice rather than crush the stalk, and they pay for themselves quickly. A Swann-Morton scalpel with a No. 11 blade or a standard craft knife handles the rest, though the blade needs replacing as soon as it drags.
Scale modelling for beginners rewards restraint here. A shelf of gadgets does not make clean seams, and most experienced modellers still reach for the same cutters, knife and sanding sticks on every build. A cheap tool that works is better than an expensive one that sits in the drawer, and the exceptions are the cutters and the brushes, where quality shows at once.
Everything else can wait. Clamps, a pin vice for drilling out holes, a razor saw, masking tape and a second grade of tweezers come in as particular builds demand them. The tools guide lays out a staged shopping list for each budget.
Cutting, cleaning and dry-fitting parts
Cut each part from the sprue a millimetre or two away from the part, not flush against it. Then take the last stub off with the hobby knife, or with a fine sanding stick, using light strokes. Cutting too close dents the surface, and plastic that has been squeezed white will show through the paint.
Mould lines are thin ridges where the two halves of the steel tool met, and they run along the edges of many parts. Scrape them lightly with the back of a knife blade held at a right angle, then smooth the area with a fine sanding stick. Ejector pin marks, the round dimples left where pins pushed parts from the mould, need filling if they sit on a visible face.
Wash the parts in warm water with a drop of washing-up liquid and a soft toothbrush, then let them dry. Mould-release agent on the plastic is invisible, but it repels paint and can cause flaking weeks later. Keep a tray with small parts labelled, because a missing landing-gear leg is harder to find than to lose.
Dry-fitting means taping or holding the major assemblies together before any cement goes on. Fuselage halves, hull sides, wing roots and turret rings are the places where a poor fit shows. Note which edge is high, which gap is wide, and which part needs thinning or trimming. Corrections made now cost minutes, while corrections made after cementing cost hours.
Cement, seams and filler
Plastic cement does not stick surfaces together the way adhesive does. It dissolves a thin layer of both surfaces, which fuse as the solvent evaporates, and so the result is a weld. Liquid cements such as Tamiya Extra Thin run by capillary action into a closed joint, which makes them the right choice for a fuselage seam. Tube cement is thicker and suits small parts that need a few seconds of grip, though it can leave strings. The glue guide compares plastic cement, superglue and PVA for each job.
Join the two halves with the dry-fit in mind, press them together and run liquid cement along the seam. A thin bead of melted plastic should squeeze out along the line. Leave it for several hours, longer if the part is under tension. Rushing this stage returns as a split seam under the paint.
Seams that stay visible need filler. Fine modelling putty such as Tamiya Basic Putty or Squadron putty is spread into the gap, left to harden and sanded flush with progressively finer grades. Thin gaps respond to superglue or to a squeeze of cement and plastic dissolved together, a mixture sometimes called a slurry. A seam on a curved surface needs patient work, since a flat sanding stick can flatten the curve.
Scribed panel lines disappear under sanding, so re-cut them with a scriber or the back of a blade, using a strip of tape as a guide. Check the result under raking light, a torch held low across the surface, which reveals every dip and ridge that the eye misses under a ceiling lamp.
Priming and painting: brush or airbrush
Primer does three jobs: it gives paint a key to bite on, it evens out the colour of mixed plastics and filler, and it exposes any seam you missed. Tamiya Fine Surface Primer in a rattle can is a common first choice, as are Mr. Surfacer 1000 and similar grades for use with an airbrush. Spray in thin passes from about twenty centimetres, outdoors or with an open window, and let the primer cure fully before handling. The priming and filling guide covers the process in detail.
Brush painting is the entry point. Use acrylics from Vallejo, Tamiya, Citadel or AK, thin them with a few drops of water or the maker’s thinner, and apply two or three light coats rather than one heavy one. Each coat should be thin enough that the primer still shimmers through at first. A flat or slightly stiff brush flattens brush marks on large panels, while a size 0 or 1 round handles the detail. The brush painting guide goes into thinning ratios and layering.
Colour choice is the part newcomers worry about most. Buy only the colours the instructions call for, plus a matt black, a white and a mid grey for mixing. Makers usually print paint references in the instruction sheet, and the paint chart helps when your preferred brand is not the one they name. Matching a shade by eye on a sunny windowsill is unreliable, so judge colours in the light the model will sit in.
Enamels such as Humbrol take longer to dry and smell strongly, but they level well and are tough. They should not be used over acrylic that has not cured, nor mixed with it.
An airbrush earns its place with large smooth surfaces, soft camouflage edges and thin even coats. A starter set means a double-action airbrush, a compressor with a tank and a moisture trap, and cleaning supplies. Iwata, Badger and Harder & Steenbeck are the long-established makers. Pressure for thinned acrylic usually sits somewhere between 15 and 20 psi, though each brush and paint will want its own number. Read the airbrushing guide before you spend money on it.
Decals and weathering
Decals come as thin films on a paper backing, and the surface underneath decides the outcome. A smooth gloss coat gives the film something to lie flat against, so spray or brush on a gloss varnish before the first one goes on. Cut each marking close to its edge, dip it in warm water for about ten to twenty seconds, then slide it off the paper onto the model with a brush or a cocktail stick.
Setting solutions such as Microscale Micro Set and Micro Sol soften the film, pull it into recesses and panel lines, and remove the silvery sheen that trapped air creates. Apply Micro Set under the decal and Micro Sol over it once it is in position, then leave it alone, because moving a softened decal tears it. The decals guide deals with large markings, old sheets and repair.
Weathering turns a toy-like model into a believable object. A wash of thinned dark paint or oil paint in the panel lines adds depth in minutes. Filters tint a surface with a thin veil of colour, dry-brushing picks out raised edges, pigments suggest dust and mud, and chipping fluid or a sponge-applied dark colour imitates worn paint. Subtlety matters more than coverage, and most beginners add too much. The weathering guide shows how to build it up in stages.
Varnish and display
Varnish seals decals and weathering and sets the final sheen. Gloss suits cars and the surface under decals, satin works for many aircraft and ships, and matt covers most military vehicles and figures. Humbrol Clearcote, Tamiya’s clear sprays and Vallejo’s varnishes are common choices. Apply the final coat in thin passes, because heavy coats pool in recesses and turn cloudy in damp air.
Remove masking tape slowly and at a low angle, then attach the last fragile parts: aerials, mirrors, undercarriage doors and propellers. A dab of PVA or cement from a pin tip is gentler than superglue on clear parts.
A display case keeps dust off, and an acrylic cover over a base is the standard way to show a single model. Without a case, a regular dusting with a soft brush is enough, and a shelf away from direct sunlight prevents colours from fading and the plastic from yellowing. A small base with some groundwork or a nameplate makes even a modest kit look finished.
Mistakes that cost a first kit, and the fixes
Most disasters in scale modelling for beginners share a handful of causes. Too much cement leaves fingerprints and softened detail, so use a thin applicator and a small amount. Painting before checking the seams means the primer reveals what filler should have hidden. Thick paint obliterates raised detail, and the fix is more thinner and more coats.
Rushing is the common thread. Paint that has not cured lifts under masking tape, a decal moved too soon wrinkles, and a seam sanded before the filler has hardened shrinks and cracks later. If a layer has gone wrong, strip it with isopropyl alcohol for acrylics or a dedicated paint remover, test on a spare part first, and start the layer again. Most errors can be undone, and a stripped part often comes out better than one that was merely repainted.
Lost parts are the other common loss. Work over a tray or a cloth with a raised edge, and if a part flies, check the floor with a torch held low. Many makers sell replacement parts, and aftermarket resin or 3D-printed items can fill gaps for out-of-production kits.
When a model really is spoiled, finish it anyway. Applying every stage once teaches the order of work, and a rough finished model is more useful than a perfect box of parts.
Scale modelling for beginners: a guide to clubs, shows and help
Reading only goes so far, and a model built beside someone more experienced improves quickly. Local clubs meet at set evenings in halls and community rooms, bring half-built projects, swap tips and often run group builds. Many welcome visitors and keep a relaxed pace. The club finder lists groups across the UK, and the society IPMS (UK) maintains a branch network of its own.
Shows are the other route. A model show puts finished work on tables, brings traders with kits, paints and spares in one room, and often includes a competition, where entries are judged in categories. Scale ModelWorld, held at Telford, is a fixture on the British calendar, and regional shows run through the year. Walking the tables is a quick education, because you see how others solve the problems you meet on the bench. The shows guide lists the circuit.
Online forums and video channels add a steady stream of answers, but they can bury a beginner under choices. That is how to start scale modelling in practice: build one kit through every stage in order, and ask for help where the work stalls. Pick one build log or tutorial for the stage you are on, follow it through, and put aside the rest. Then take the kit to a club night and ask someone to look at the seam you are unsure about.