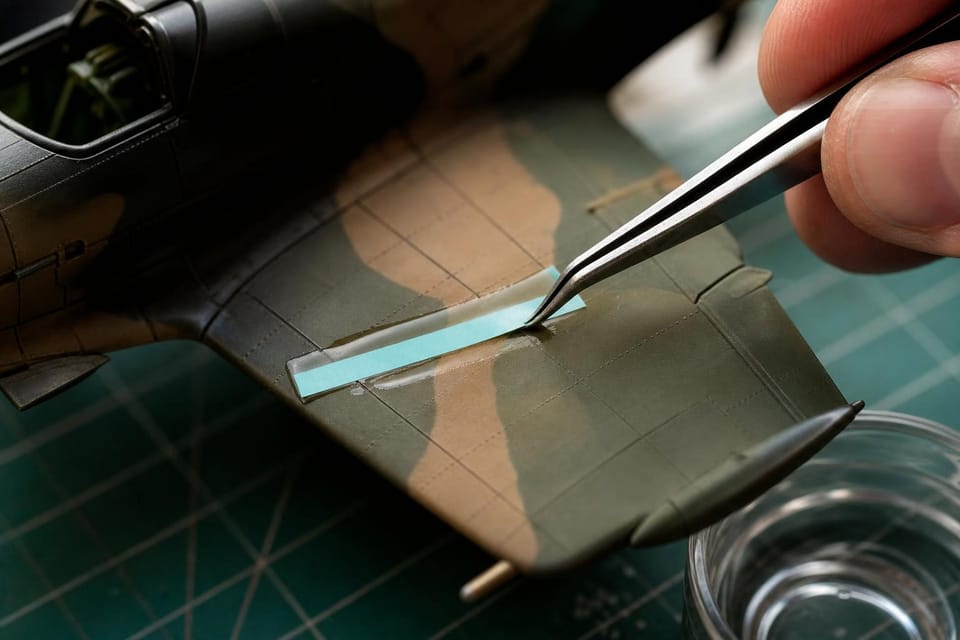
The decal slides into place, the carrier film looks clear and everything seems right. Then the paint dries and a white-silver sheen spreads across the roundel like frost on a window. That is silvering, and it was decided before the decal went near the water.
Start with a gloss surface
Decals sit on a thin carrier film. On a matt or satin finish, the surface has tiny peaks and hollows, and air trapped under the film shows as silver. A gloss surface leaves no air to trap.
Seams and scratches show through gloss, so finish priming and filling first. Spray or brush a gloss varnish over the area where decals will go. Aircraft kits carry the most markings, so the aircraft guide is worth a read alongside this one. Acrylic gloss (Tamiya X-22, Vallejo gloss varnish) and enamel gloss (Humbrol, Revell) both work. Let it cure for at least a day, since decals applied to a tacky surface can fog the varnish. If your model has a matt camouflage coat, gloss only the decal areas or the whole model, and matt it down again at the end. A properly airbrushed gloss coat is smoothest, but a thin brushed coat is enough for small decals.
Cut, soak and slide
Cut each decal from the sheet with a sharp knife or fine scissors, leaving as little carrier film around it as possible. A clear margin is what shows up later as a halo, so trim close.
Hold the decal with tweezers and dip it in lukewarm water for 10 to 20 seconds, until it loosens on the backing. Rest it on a damp paper towel for a few seconds more so the glue softens. Water that is too hot will wash off the adhesive and curl the film.
Slide the decal off the paper with a wet brush rather than lifting it. Position it with a damp cotton bud or the brush, blotting gently from the centre outwards to push out water and air.
Setting and softening solutions
Two products do different jobs.
Setting solutions help the decal adhere and settle. Microscale’s Micro Set and Mr. Hobby’s Mr. Mark Setter are brushed under the decal before it is positioned.
Softening solutions soften the film so it conforms over rivets, raised panels and compound curves. Micro Sol and Mr. Mark Softer are applied over the top once the decal is in place. Mr. Mark Softer is generally regarded as the stronger of the common softeners, and too much on a thin decal can wrinkle or dissolve it.
Brush on setting solution, position the decal, then apply softening solution lightly and leave it alone. The film will wrinkle as it softens, and that is normal. Do not touch it until it has settled flat, which may take half an hour.
Curves, rivets and panel lines
Large decals over engraved detail are where most failures happen. A wing roundel crossing a row of panel lines will hover over every groove until the softener pulls it down.
Work in stages. Apply setting solution, slide the decal on, and dab out the water. Once it has dried slightly, brush on softener and watch the film start to sink into the lines. Do not press it into the grooves with a hard tool. If the decal lies over a deep recess, a gentle pass with a soft, damp brush is enough, and a sharp blade can slit the film along a panel line so it settles properly.
On curved surfaces such as engine cowlings, split a large decal into two halves if the sheet allows it, or cut small relief slits along the edge so it wraps without folding. Warming the decal with a hairdryer on its lowest setting for a few seconds can help a stiff film relax, but keep the air gentle.
Large markings and long stripes
Long stripes and national markings across a fuselage need guidance. Dry-fit them first by placing the decal on its backing against the model and checking its length. Apply the centre first and work outwards, aligning against a panel line or the edge of a canopy frame. Leave a thin film of water under the decal for a minute so you can still nudge it before the glue takes hold.
Small stencils and warning markings follow the same method, although these tiny decals often curl on a dry surface, so wet the area with setting solution first.
Fixing silvering
If you find silvering after drying, open the air trapped under the film. Prick the silver area with the point of a fresh blade. Brush on softening solution and leave it. Press the decal down with a damp cotton bud, working from the edges of the patch inwards. Repeat if needed.
Prevention is more reliable than cure. If a whole sheet silvers on a matt coat, the gloss was missing, not the technique.
Decal film and thin or old sheets
Old decals are brittle and shrink as the glue ages. A thin coat of liquid decal film, brushed over the sheet and dried before cutting, holds an old or damaged sheet together. Thin aftermarket sheets from printers such as Cartograf conform well, while thicker kit decals often benefit from a stronger softener. Test on a spare piece of the sheet or on the underside of the model before committing to a prominent marking.
Sealing
Once all decals are dry, wait a day and then seal. A clear coat in the finish you want, gloss for a car or satin or matt for a military subject, protects the decals and hides the film edges. Spray in light coats. Apply matt varnish too heavily and it can frost over the decals, so build it gradually. Check the sealed surface under a bright lamp from a low angle: any remaining silvering or edge halo shows up now, while a fix is still possible with a fine brush and a little matching paint along the decal edge.
Next step
Cut a single small decal from the sheet, apply it to a gloss test piece and compare it with a decal put on a matt patch. The difference makes the case for gloss better than any explanation. When the markings are settled and sealed, weathering blends them into the paint. For car subjects, the cars guide covers gloss finishes in more detail.