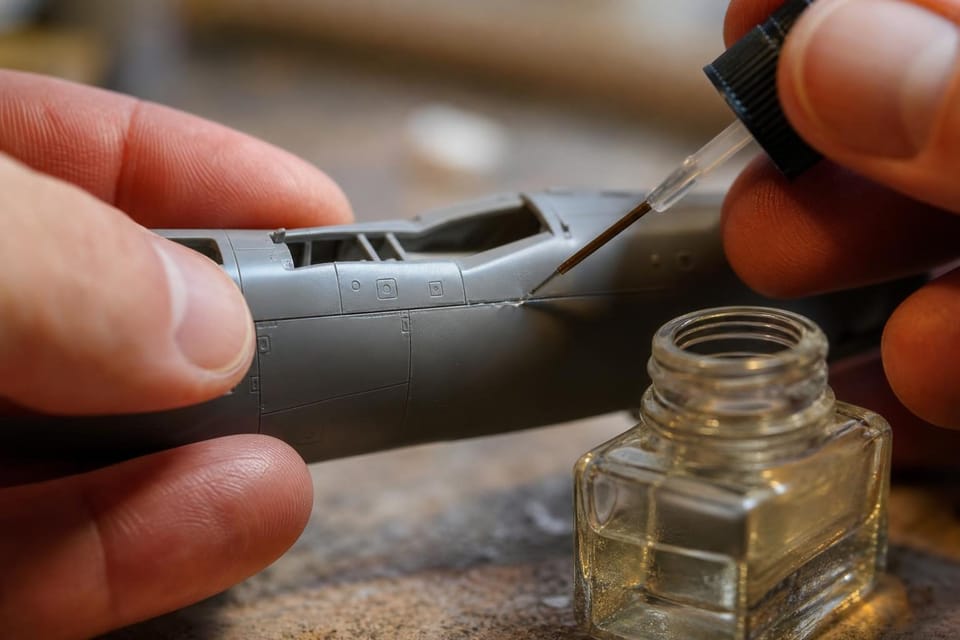
A wing root that will not stay shut and a fingerprint melted into a fuselage have the same cause: the wrong glue, or too much of the right one. Modelling adhesives look alike on the shelf but behave very differently, and picking the correct one for each job is half of a tidy build. The basics are laid out here; the overall order of work is in the beginner’s guide.
How plastic cement works
Plastic cement is a solvent, not an adhesive in the usual sense. It softens a thin layer of polystyrene on both surfaces, and as the solvent evaporates the two layers fuse into one. The result is a weld, and a good one is as strong as the surrounding plastic.
That explains the rules. Cement only works on polystyrene, so it does nothing for metal, resin or clear acetate. It needs surfaces that touch. And it removes material, which is why a smear on a wing or a panel line can erase detail that no filler will put back.
Most cements are thin and liquid. They wick along a seam by capillary action, so the usual method is to hold the parts together dry and run the brush along the joint. A thin line of melted plastic should show on the surface, which is sanded flush later.
Liquid, tube and brush-on: choosing a cement
Thin liquid cement is the first bottle to buy. Tamiya Extra Thin Cement, with a brush in the cap, and Revell Contacta Professional, with a needle applicator, are widely sold and widely used. Both flow quickly and give the cleanest seams.
Tube cement is thicker, and Humbrol’s tube and liquid polystyrene cements are a long-standing example. It is useful for small parts that must be held for a few seconds, and for wide contact faces. It can string and leave blobs, so apply it sparingly with a cocktail stick.
Liquid cement is not suitable for parts that need to be positioned before they grip, since the join is effectively instant. Use tube cement or give yourself time by applying a little cement to one face and sliding the other into place.
| Adhesive | Best for | Grip time | Main risk |
|---|---|---|---|
| Thin liquid cement | Seams, large joins on polystyrene | Seconds to grip, hours to cure | Melted detail |
| Tube cement | Small parts, wide faces | A minute or so | Strings and blobs |
| Superglue, gel | Metal, resin, photo-etch | Seconds, with accelerator | Frosting on clear parts |
| PVA or canopy glue | Clear parts, groundwork | Several minutes | Weak on stressed joints |
Superglue and accelerator
Cyanoacrylate, sold as superglue, bonds by reacting with surface moisture rather than by dissolving the plastic. That makes it the right choice for resin, white metal and photo-etched brass, where cement does nothing. Gel types hold in place without running, and a drop on a scrap of card applied with a cocktail stick or a pin gives control.
A spray or liquid accelerator sets the bond in seconds. It is useful for tiny parts, though it can leave a rough finish and cloud adjacent surfaces. Use it sparingly and keep it away from clear parts.
Superglue gives fumes that frost clear plastic, so keep it well away from canopies. It also sticks fingers, and a debonder sold for the purpose helps when the inevitable happens. Fill a seam with it and the result is hard, so sand with care.
PVA and clear-part glues
White PVA glue, thinned slightly or in its canopy-specific forms such as Micro Kristal Klear, is the adhesive for transparent parts. It dries clear, tolerates small excess because it wipes off with a damp cotton bud, and does not attack clear plastic or cause fogging. The joint is not strong, so keep canopies away from knocks, but it is the cleanest choice for clear parts on an aircraft or a car window.
PVA also fixes groundwork materials, such as sand, flock and static grass, on bases, and it holds small parts temporarily so they can be adjusted. Dry it overnight before painting near it.
Awkward parts: undercarriage, tracks and small details
Landing gear legs carry the weight of the model, so they deserve a proper joint. Cement alone can hold a plastic leg, but a drilled hole and a brass pin set in superglue gives a bond that survives handling. Wheels are best attached last, once the model is painted, with a dot of tube cement on the axle.
Vinyl and rubber tracks, found in older armour kits, do not take plastic cement at all. Superglue holds them, though some types harden and crack over the years. Link-by-link plastic tracks take liquid cement well, and a few clamps or a strip of tape hold the run in shape while it grips.
Tiny parts such as aerials, mirrors and handles go on with a pin tip of gel superglue or PVA, applied to the model rather than the part. Hold with tweezers for a few seconds and leave untouched.
Choosing by job
A short rule covers most builds. Use thin liquid cement for fuselage halves, hull sides, wing roots and anything that needs a welded seam. Use tube cement when a part has to be held in place for a few seconds, such as a large flat face or a stand. Use gel superglue for resin, metal and photo-etched parts, and for gaps that need filling quickly. Use PVA for canopies, lights and groundwork.
Mixing methods in one build is normal. A single aircraft kit can easily involve all four: cement for the airframe, superglue for a brass pitot tube, PVA for the canopy and tube cement for the undercarriage doors. Keep each adhesive in its own labelled place on the bench so the wrong one is never picked up by accident.
Avoiding a mess
Most problems come from quantity. Use the smallest amount that makes the joint, apply it away from visible faces and let it work. A cocktail stick or a cut sprue as an applicator gives more control than a brush loaded from the bottle.
Dry-fitting every join before cement avoids the worst surprises. Clamps and rubber bands hold large assemblies, while masking tape pulls fuselage halves together evenly. If cement lands where it should not, dab it with a dry cotton bud, do not rub, and leave it to harden before sanding. A fingerprint set in cement will sand out; one smeared across fine detail will not.
Ventilation matters because these solvents are irritants, and a window open and lids on bottles between uses is the minimum. Keep adhesives away from flames and out of reach of children.
Once a seam has set, it moves to priming and filling, where any gaps show up. The tools guide lists the cutters, knife and clamps that make clean joints easier, and the scales guide helps when parts get small enough that glue choice really matters.